Sunday, July 27, 2014

Eat from the garden for August

Okay, I'm going to try something this summer.  I'm going to try and get my family to only eat the veggies and fruit that we either already have in the house or that we get from the garden or a local U-Pick.  I don't want to buy any fruits or vegetables from the store.  We have this amazing garden, so why not use it all?

I'm not entirely sure how my two men will deal with that as we will have to eat a lot of zucchini and peas, but I'm going to implement this experiment.

Wish us luck!

Not sure when I took this one, but earlier than the one below

July 18, 2014

Friday, July 18, 2014

Tomatoes - pruning and care.

I've been growing tomatoes for the past 15 years or so.  I started off with tomato plants on my balcony in an apartment, and now I'm lucky enough to own my own house and have a large yard with a big garden.  Tomatoes always make up a big portion of it.  I think the most plants I ever grew was around 80.  I'm down to about 1/2 of that now.  I still have canned tomatoes from 2012 and 2013, so I need to tone it down.  

People tell me that tomatoes can be tricky - and I've certainly had my bad experiences with them (one year I had 200lbs of tomatoes melt in my basement from blight!).  But in general, with a few basics, tomatoes are pretty easy and well worth any effort.  Have you eaten a tomato from the grocery store lately?  Or on a hamburger - you know, the mealy pink ones?  They are gross.  And not what a tomato should be like.  So the real ones are totally worth it.

1) GROWING FROM SEED:  I grow my heirlooms from seed, and this year I grew a lot of them from seed I saved from last year.  I started them inside in March.  I have a bright south-facing room and a small greenhouse that fits in a window.  That combination works well.  The first year I tried, though, I didn't have the greenhouse and all I got was long, stringy tomato plants that were so weak I had to throw them out.  Failure = Learning.  

2) PLANTING:  You plant them after the last frost - and after you've hardened them off - tomatoes don't like going from nice warm greenhouse to cool, sunny, breezy out-of-doors.  So you give them short exposures for a few days until they get used to it.  Kinda like you give yourself short bursts of sun before spending hours out there.

3) CALCIUM:  But after frost and hardening off, they go in the ground.  Tomatoes like calcium - or they get blossom end rot.  It doesn't completely ruin your fruit, but it's not pleasant.  I have been collecting all of my egg shells, grinding them with my mortar and pestle, and sprinkling them on the ground around the plants this year.  I'll let you know how it works.  Bone meal is also good, and one year I planted each of my tomatoes with a calcium tablet (not sure if that worked or not, but I haven't had blossom end rot for a while).

4) WATER:  Tomatoes require water and heat.  They liked to be watered at regular intervals - every second day or so if they are in the ground, every day if you have them in planters.  Uneven watering leads to cracked fruit, dead fruit, or (again) blossom end rot.  So water them regularly.  We've had some long hot stretches this year and then heavy downpours, and I noticed one of my young fruits is cracked.  Doesn't usually happen here for me.

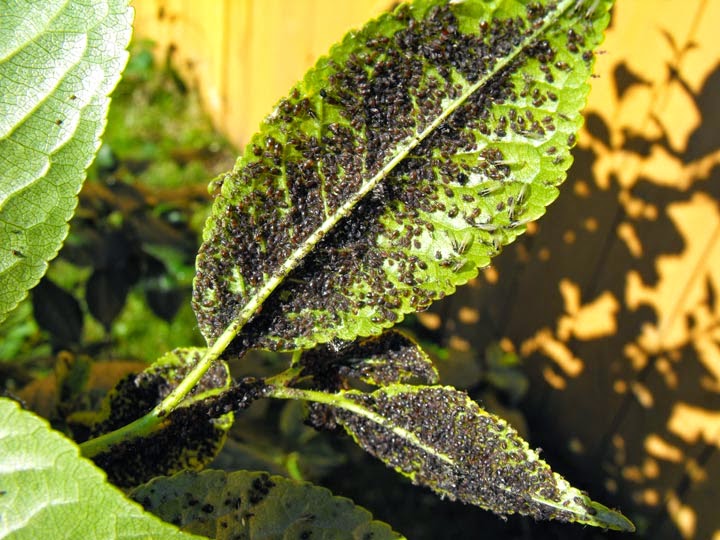
5) PRUNING:  Tomatoes need to be pruned.  They grow suckers from the joint where the leaf meets the stem of the plant.  Removing these suckers reduces the size of the plant (they can get quite unmanageable when they get too big), and lets more of the plant's energy go into the fruit and not the leaves.


Typical Sucker growing from leaf joint.


After sucker pinched off - just bend them off, that usually works.

I "head" my tomatoes.  Once the plants have enough flowers or fruit on them and they are getting tall (at about this time of the year) I start to cut the top of the plants off.  Again, the theory is that the energy will go into the fruit.  Don't know if you have to do this, but it also helps keep the tomato patch a little less overgrown.


I also start to cut the lower leaves off the plant once they are about 3 feet tall or so.  This allows you to see the stem of the plant and make sure it's healthy, but it also limits exposure to blight.  Blight is a disease that is in the ground and can bounce up onto the stem and the lower leaves and cause a great deal of damage.


6)  COPPER SPRAY:  After losing tomatoes to blight one year, I've been using copper spray to keep the disease at bay.  They say once it is in your soil, it stays there for several years.  The first year after the blight I sprayed about every two weeks.  It's been getting less frequent every year.  This year I haven't done it yet, but I've meant to, and I hope to remember to do it today.

Friday, July 4, 2014

Satin Moth

We are fairly over-run with Satin Moth caterpillars this year.  They look suspiciously like tent caterpillars, but they are not.  They are a variety of Tussock Moth.  Apparently they eat foliage, but I haven't seen too much damage, so I haven't been killing them.  Actually, someone came to visit my house the other day and squashed one - it kind of upset me.  I don't see the point in killing things unless they are doing damage (like millions of aphids) - although, when their offspring are with us next year, I'll likely be kicking myself for letting so many of them live.  I have rescued a couple from spider webs - although I feel conflicted because the spiders need to eat, too.

I've always thought that caterpillars wrapped themselves in silk and turned into a cocoon.  But that is  not entirely the case with these ones - I'm not sure about all the other caterpillars out there.  This afternoon, I watched as a pupa (I think) wriggled out of it's caterpillar skin, changed colours and started to turn into a hard-shelled chrysalis - is this the difference between a cocoon and a chrysalis - I really don't know.  Anyhow, it was pale and soft when it emerged:


Within an hour was dark and I assume hard:


 So it has silk around it, but the casing seems to be a hard exoskeleton-like coating.

Here are some others in different stages of development:


It's pretty cool.  Hope I get to see some of the moths - and I really hope they don't strip our trees next year!


Garden July 4, 2014

Someone posted pictures of their garden on Facebook today, and I realized I hadn't done that yet this year.  So here is this year's garden.  Just slightly bigger than last years, the garden is now 20x40, or 800 square feet.


Every year I have problems with different pests.  This year it is flea beetles (which I've had in the past), and cut worms.  As a matter of fact, cut worms took down two tomato plants and one of my cabbages (and another cabbage is greatly stunted from cut worm damage).  Oh well, that's how it goes in a garden.

Tuesday, July 1, 2014

Aphids!!

Got up this morning and headed out to weed the garden.  For some reason I looked at one of our 2-year-old cherry trees to see if cherries were visible yet and I saw something bad.  Really bad.  The bottoms of most of the newer leaves were black.  Like dirt had been sprayed up under them.

Upon closer look, I saw that several ladybugs were present on the tree as well as ants.  And a few of the black dirt spots were developing wings - aphids!


I don't like to spray insecticides - they tend to kill of of the bugs, not just the bad ones - the spiders, ladybugs and ants can stay.  But the aphids had to go.

So I got out the best tool I could think of - my fingers.  I went branch by branch and squished as many of the little buggers as I could and then sprayed them off with my hose.  It took an hour and a half to remove the majority of the infestation.  Believe me, I have no illusions that I got rid of them all.


I literally had blood on my hands!  But aside from using insecticides, I couldn't think of what would do as thorough a job.  I just read where garlic is a good companion plant for cherry trees.  Not sure if I can still plant garlic at this late date, but I think I'll try - even if it doesn't produce, it might help keep the pests at bay.

As I went through and got rid of the aphids, I marked each branch with a bread bag tie (being careful not to damage the branches) - it was confusing not knowing which ones I'd done already and this definitely helped.


As an interesting aside, I found 3 ladybugs together - I assume the males were fighting over the female - or there was something kinky going on.